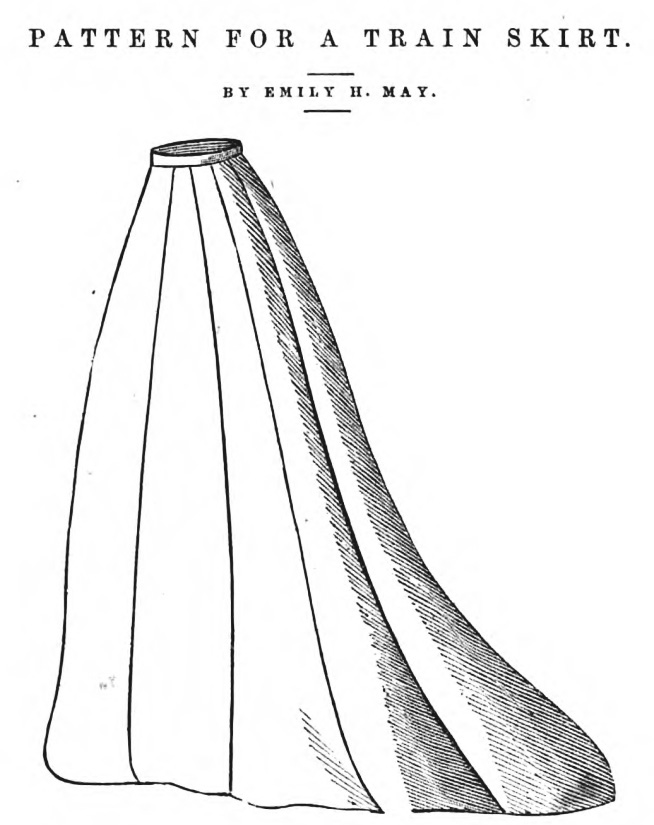
So einfach kann ein Rockschnitt sein – 5 Teile, die zusammen 9 Bahnen ergeben. Dieses Rock-Schnittmuster ist zum selbst nachzeichnen gedacht. Entsprechende Längenangaben in Inch sind teilweise mit angeführt.
Die Original-Beschreibung:
Ladies frequently complain of the difficulty of getting a good-fitting skirt to wear under a train. We give above an engraving of one, and, on the next page, a diagram by which a paper pattern may be cut out.
The pattern consists of four and a half breadths, and respresents exactly one half of a train skirt, which, when complete, should include nine breadths. Half of the front breadth only is given in our pattern. There will be no difficulty in distinguishing the breadths from each other, if careful attention is paid to the notches in the lines of the diagram at the top of each piece.
The front breadth must be cut entire; let it be well understood that there is no seam up the front of the skirt, therefore, the material from which it is cut must be doubled down the center, and the paper representing it laid on it, with its straight edge over the doubled center. On the seam of the front breadth there is a single notch; this must be joined to the second breadth, which has one notch on one edge and two on the other; by making these notches in the different breadths match, the skirt can be easily formed. There is a seam up the center of the back. It will be found that every breadth is straight at one side with the exception of the second, both sides of which are sloped at the top. There is no fullness round the waist, the skirt being sewn plain to a waistband, and the overplus material put into one large box-pleat at the back. This pattern will suit a figure of moderate height – five feet three and a half inches; but should any shortening or lengthening be required to suit an individual figure, it must be allowed for at the bottom, and not at the top of the skirt.
Die Reihenfolge von vorne nach hinten ist wie folgt: 2, 3, 4, 5, 1 – also 2 wird im Stoffbruch zugeschnitten mit der Kante ohne Markierung im Stoffbruch und Fadenlauf. Alle anderen Bahnen werden jeweils mit der nach vorne gerichteten Seite gerade (also Fadenlauf) geschnitten. In der Beschreibung wird für Nr. 3 (was die zweite Bahn wäre) angegeben, dass diese mit beiden Seiten schräg zugeschnitten würde, also Fadenlauf mittig – ganz klar ist das nicht, denn in der Zeichnung ist definitiv eine äußerst gerade Linie zu entdecken; muss man wohl ausprobieren. Nr. 1 ist die hinterste Rockbahn, die etwas wulstige Linie ist die rückwärtige Mitte.
Sollte die Länge nicht ausreichen, soll man diese nach unten verlängern (also nicht oben) – das ist logisch.
Die Rockteile werden also wie beschrieben aneinander und an einen einfachen Rockbund genäht. Sollte es dazu kommen, dass es am Rockbund Überweite gibt, wird diese in eine einzige große Kellerfalte (box pleat) gefaltet.
Wo genau ein Verschluss untergebracht ist, wird nicht explizit erklärt. Ich persönlich würde sagen in einer der seitlichen Nähte, um die rückwärtige Kellerfalte vernünftig festnähen zu können. Falls euch etwas anderes bekannt ist, würde ich mich sehr über einen Kommentar freuen.
Dieser Rock wird laut Beschreibung unter einen Rock mit Schleppe gezogen – die Ladies in 1868 haben sich wohl beschwert, keinen gut sitzenden Rock für unter einen Schleppen-Rock zu finden. 🙂


